DA14580 LED blink ---------DA14580的IO控制。
时间:10-02
整理:3721RD
点击:
首先要有个感性认识,
打开DA14580的blinky_arrived例程,
[C] 纯文本查看 复制代码
/** **************************************************************************************** * [url=home.php?mod=space&uid=159083]@brief[/url] Main routine of the UART example * **************************************************************************************** */int main (void){ system_init(); periph_init(); blinky_test(); while(1);}因为仅是一个IO口及UART工作,所以,代码很简单。
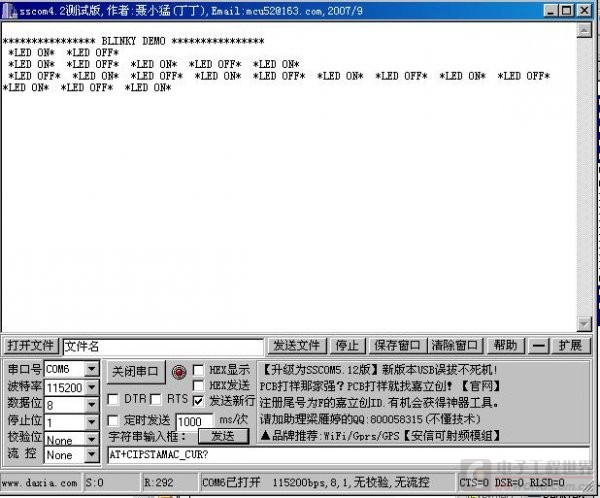
将它编译,运行,并打开串口工具,

1、IO的控制 ---------system_init
[C] 纯文本查看 复制代码
/** **************************************************************************************** * @brief System Initiialization * * **************************************************************************************** */void system_init(void){ SetWord16(CLK_AMBA_REG, 0x00); // set clocks (hclk and pclk ) 16MHz SetWord16(SET_FREEZE_REG,FRZ_WDOG); // stop watch dog SetBits16(SYS_CTRL_REG,PAD_LATCH_EN,1); // open pads SetBits16(SYS_CTRL_REG,DEBUGGER_ENABLE,1); // open debugger SetBits16(PMU_CTRL_REG, PERIPH_SLEEP,0); // exit peripheral power down}程序中,SetWord16是对寄存器直接写入的宏。第一个参数为寄存器的直接地址,第二个参数为要写入的值,
Dialog常用这种办法,实现对芯片的设置的。
在它的头文件datasheet.h中,可以看到,给出了每个寄存器的地址定义,对于需要对每个位控制的寄存器,也提供了相应的结构,如:
[C] 纯文本查看 复制代码
/*=============================*/struct __CLK_PER_REG/*=============================*/{ WORD BITFLD_TMR_DIV : 2; WORD : 1; WORD BITFLD_TMR_ENABLE : 1; WORD BITFLD_WAKEUPCT_ENABLE : 1; WORD BITFLD_I2C_ENABLE : 1; WORD BITFLD_UART2_ENABLE : 1; WORD BITFLD_UART1_ENABLE : 1; WORD BITFLD_SPI_DIV : 2; WORD : 1; WORD BITFLD_SPI_ENABLE : 1; WORD : 2; WORD BITFLD_QUAD_ENABLE : 1;};2、blinky_test函数
[C] 纯文本查看 复制代码
/** **************************************************************************************** * @brief Blinky test fucntion * * **************************************************************************************** */void blinky_test(void){ int i=0; // Select function of the port P1.0 to pilot the LED printf_string("\n\r\n\r"); printf_string("***************\n\r"); printf_string("* BLINKY DEMO *\n\r"); printf_string("***************\n\r"); while(1) { i++; if (LED_OFF_THRESHOLD == i) { GPIO_SetActive( LED_PORT, LED_PIN); printf_string("\n\r *LED ON* "); } if (LED_ON_THRESHOLD == i) { GPIO_SetInactive(LED_PORT, LED_PIN); printf_string("\n\r *LED OFF* "); } if (i== 2*LED_ON_THRESHOLD){ i=0; } }}此函数使用了两个控制IO状态的函数:
GPIO_SetActive
GPIO_SetInactive
其关键的也是使用SetWord16宏来对寄存器控制,但多了个端口的凑数。
不错,有用。
