采用Mbed开发并导入vcnl40x0库。
时间:10-02
整理:3721RD
点击:
1、项目开发可以采用多种工具,不过用得最简便的就是mbed
2、首先创建一个project,然后搜索,发现有vcnl库,这样就不用移植厂家提供的资料了。
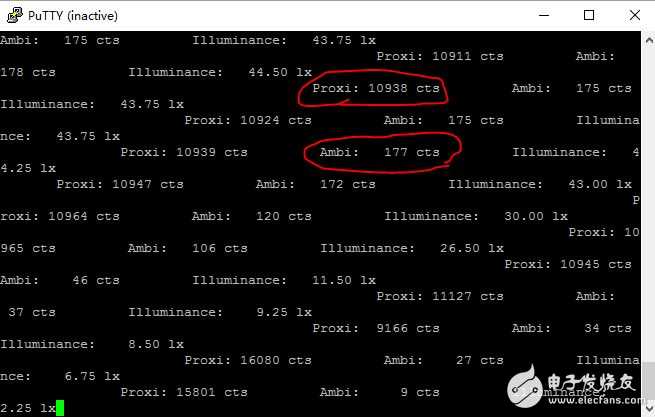
不过这个库是针对LPC1768的工具,还需要对head文件进行剪裁才可以。反复修改,通过了初步测试,还不错,就是 结构有些乱。不过能显示出采集的传感器数据了。

初步显示的就是所采集的系数。
3、程序如下。其中需要自己根据原理图确定I2C的接线引脚,因为没有办法直接引用board.h,所以要核对一下,这里用的是Pin0 _11和Pin0_10。核对图纸,编号顺序是反的,不能搞错的。
#define VERSION "\n Version: 1.2 01/2012\n"
#define BAUD 9600// increase up to 921600 for high speed communication (depends on terminal programm and USB mode)
#include "mbed.h"
#include "VCNL40x0.h"
//VCNL40x0 VCNL40x0_Device (p28, p27, VCNL40x0_ADDRESS); // Define SDA, SCL pin and I2C address
VCNL40x0 VCNL40x0_Device (P0_11, P0_10, VCNL40x0_ADDRESS); // Define SDA, SCL pin and I2C address
DigitalOut mled0(LED1); // LED #1
DigitalOut mled1(LED2); // LED #2
DigitalOut mled2(LED3); // LED #3
Serial pc(USBTX, USBRX); // Tx, Rx USB transmission
/////////////////////////////////////////////////////////////////////////////////////////////////////////////////////////
// main #1
// Read Proximity on demand and Ambillight on demand in endless loop
/////////////////////////////////////////////////////////////////////////////////////////////////////////////////////////
int main() {
unsigned char ID=0;
unsigned char Current=0;
unsigned int ProxiValue=0;
unsigned int AmbiValue=0;
pc.baud(BAUD); // set USB speed (virtual COM port)
// print information on screen
pc.printf("\n\n VCNL4010/4020 Proximity/Ambient Light Sensor");
pc.printf("\n library tested with mbed LPC1768 (ARM Cortex-M3 core) on www.mbed.org");
pc.printf(VERSION);
pc.printf("\n Demonstration #1:");
pc.printf("\n Read Proximity on demand and Ambillight on demand in endless loop");
VCNL40x0_Device.ReadID (&ID); // Read VCNL40x0 product ID revision register
pc.printf("\n\n Product ID Revision Register: %d", ID);
VCNL40x0_Device.SetCurrent (20); // Set current to 200mA
VCNL40x0_Device.ReadCurrent (&Current); // Read back IR LED current
pc.printf("\n IR LED Current: %d\n\n", Current);
wait_ms(3000); // wait 3s (only for display)
// endless loop /////////////////////////////////////////////////////////////////////////////////////
while (1) {
mled0 = 1; // LED on
VCNL40x0_Device.ReadProxiOnDemand (&ProxiValue); // read prox value on demand
VCNL40x0_Device.ReadAmbiOnDemand (&AmbiValue); // read ambi value on demand
mled0 = 0; // LED off
// pront values on screen
pc.printf("\nProxi: %5.0i cts \tAmbi: %5.0i cts \tIlluminance: %7.2f lx", ProxiValue, AmbiValue, AmbiValue/4.0);
}
}
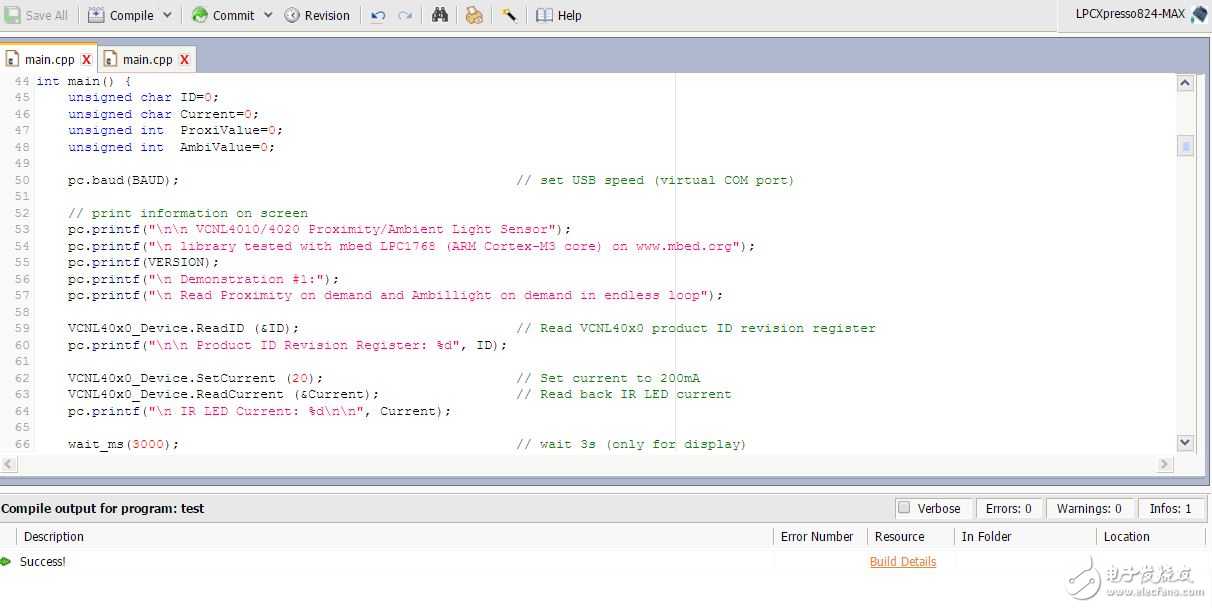
程序截图如下。

板子要选择LPC824-MAX
2、首先创建一个project,然后搜索,发现有vcnl库,这样就不用移植厂家提供的资料了。
不过这个库是针对LPC1768的工具,还需要对head文件进行剪裁才可以。反复修改,通过了初步测试,还不错,就是 结构有些乱。不过能显示出采集的传感器数据了。

初步显示的就是所采集的系数。
3、程序如下。其中需要自己根据原理图确定I2C的接线引脚,因为没有办法直接引用board.h,所以要核对一下,这里用的是Pin0 _11和Pin0_10。核对图纸,编号顺序是反的,不能搞错的。
#define VERSION "\n Version: 1.2 01/2012\n"
#define BAUD 9600// increase up to 921600 for high speed communication (depends on terminal programm and USB mode)
#include "mbed.h"
#include "VCNL40x0.h"
//VCNL40x0 VCNL40x0_Device (p28, p27, VCNL40x0_ADDRESS); // Define SDA, SCL pin and I2C address
VCNL40x0 VCNL40x0_Device (P0_11, P0_10, VCNL40x0_ADDRESS); // Define SDA, SCL pin and I2C address
DigitalOut mled0(LED1); // LED #1
DigitalOut mled1(LED2); // LED #2
DigitalOut mled2(LED3); // LED #3
Serial pc(USBTX, USBRX); // Tx, Rx USB transmission
/////////////////////////////////////////////////////////////////////////////////////////////////////////////////////////
// main #1
// Read Proximity on demand and Ambillight on demand in endless loop
/////////////////////////////////////////////////////////////////////////////////////////////////////////////////////////
int main() {
unsigned char ID=0;
unsigned char Current=0;
unsigned int ProxiValue=0;
unsigned int AmbiValue=0;
pc.baud(BAUD); // set USB speed (virtual COM port)
// print information on screen
pc.printf("\n\n VCNL4010/4020 Proximity/Ambient Light Sensor");
pc.printf("\n library tested with mbed LPC1768 (ARM Cortex-M3 core) on www.mbed.org");
pc.printf(VERSION);
pc.printf("\n Demonstration #1:");
pc.printf("\n Read Proximity on demand and Ambillight on demand in endless loop");
VCNL40x0_Device.ReadID (&ID); // Read VCNL40x0 product ID revision register
pc.printf("\n\n Product ID Revision Register: %d", ID);
VCNL40x0_Device.SetCurrent (20); // Set current to 200mA
VCNL40x0_Device.ReadCurrent (&Current); // Read back IR LED current
pc.printf("\n IR LED Current: %d\n\n", Current);
wait_ms(3000); // wait 3s (only for display)
// endless loop /////////////////////////////////////////////////////////////////////////////////////
while (1) {
mled0 = 1; // LED on
VCNL40x0_Device.ReadProxiOnDemand (&ProxiValue); // read prox value on demand
VCNL40x0_Device.ReadAmbiOnDemand (&AmbiValue); // read ambi value on demand
mled0 = 0; // LED off
// pront values on screen
pc.printf("\nProxi: %5.0i cts \tAmbi: %5.0i cts \tIlluminance: %7.2f lx", ProxiValue, AmbiValue, AmbiValue/4.0);
}
}
程序截图如下。

板子要选择LPC824-MAX
