现在想要CC3220SF 配置到AP模式,与手机或平板实现数据收发,SDK看哪个例程比较好?
我手里的开发板是CC3220 LaunchPad Rev-A 注意这个版本号"Rev-A",我根据quick start指导文件里发现跟文档里的开发板版本不一样啊,文档里是Rev-B啊,另外下载下来的安卓Provisioning工具界面也跟文档里不一样啊,根本没戏。
这个就不讲了,看了一个例程“network_terminal_CC3220SF_LAUNCHXL_tirtos_ccs”想要配置到AP模式然后下发数据发现实现不了啊,不知道错在哪里了。
我现在想将cc3220配置到AP模式,向安卓手机下发数据,然后安卓手机做相应的应答:
1.看哪个例程方便一点啊?
2.有没有安卓手机支持的APP可以简单测试一下我说的数据收发功能的?
1、下载CC3220SDK: http://www.ti.com.cn/tool/cn/simplelink-cc3220-sdk 参考里面的例程
2、软件推荐wifi starter: http://www.ti.com.cn/tool/cn/wifistarterpro
这么具体的例子目前CC3220的SDK里没有. 最接近的可以参考如下CC3200的SDK里的out of box例子
SDK下载地址:http://www.ti.com/tool/cc3200sdk
例子地址如下,这个是做AP的例子
http://processors.wiki.ti.com/index.php?oldid=184832
CC3200 Out of Box Application
Revision as of 08:04, 8 September 2014 by Jitgupta (Talk | contribs) (→Usage)
![]()
![]()
Contents
[hide]- 1 Overview
- 2 Usage
- 3 Demos
- 4 Limitations/Known Issues
- 5 Links
Overview
This Application demonstrates Out of Box Experience with CC3200 Launch Pad. It highlights the following features
- Easy Connection to CC3200 Launchpad
- Direct Connection to Launchpad by using CC3200 device in Access Point Mode(Default)
- Connection using TI SmartConfigTechnology
- Easy access to CC3200 Using Internal HTTP server and on-board webcontent
- Attractive Demos
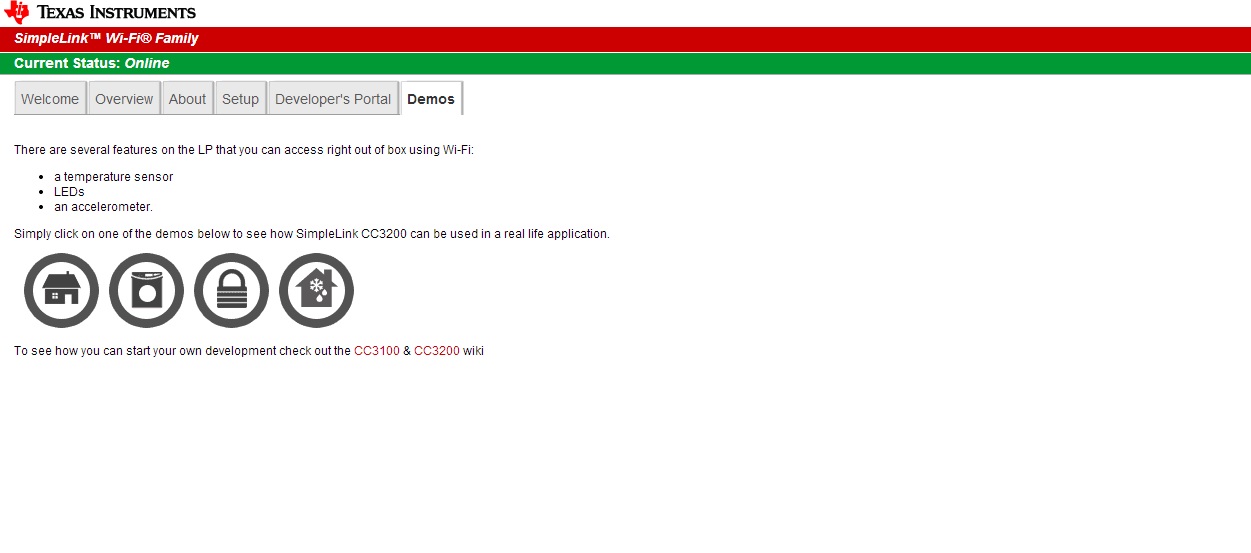
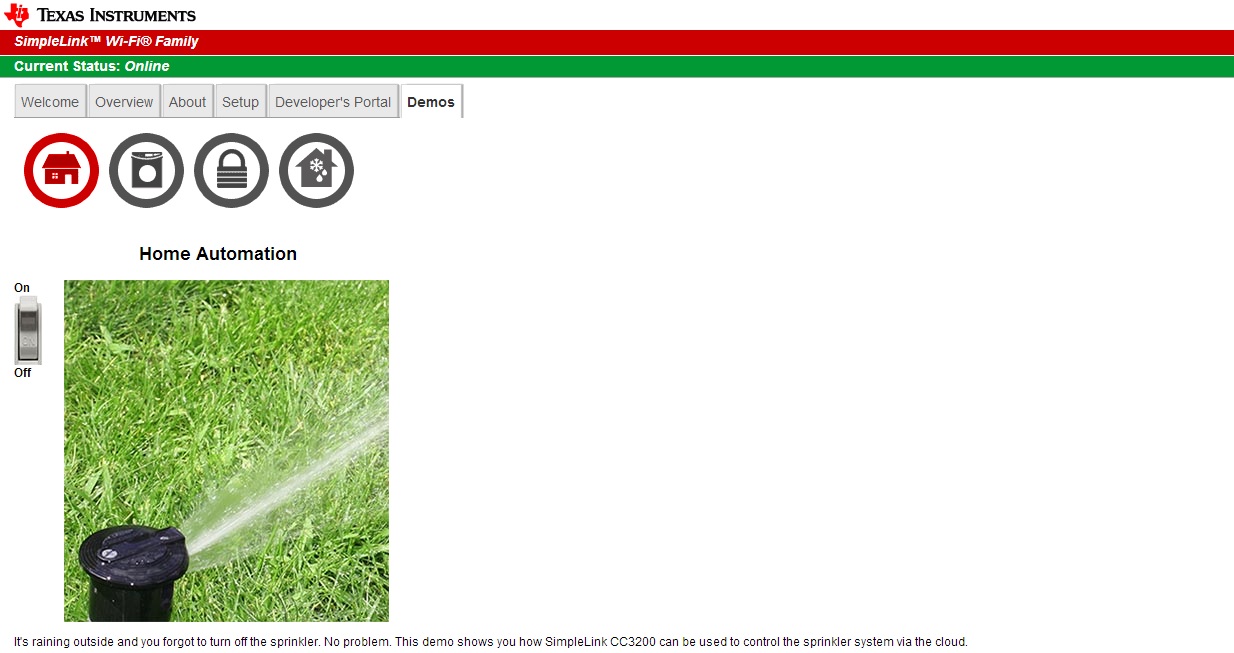
- Home Automation
- Appliance Control
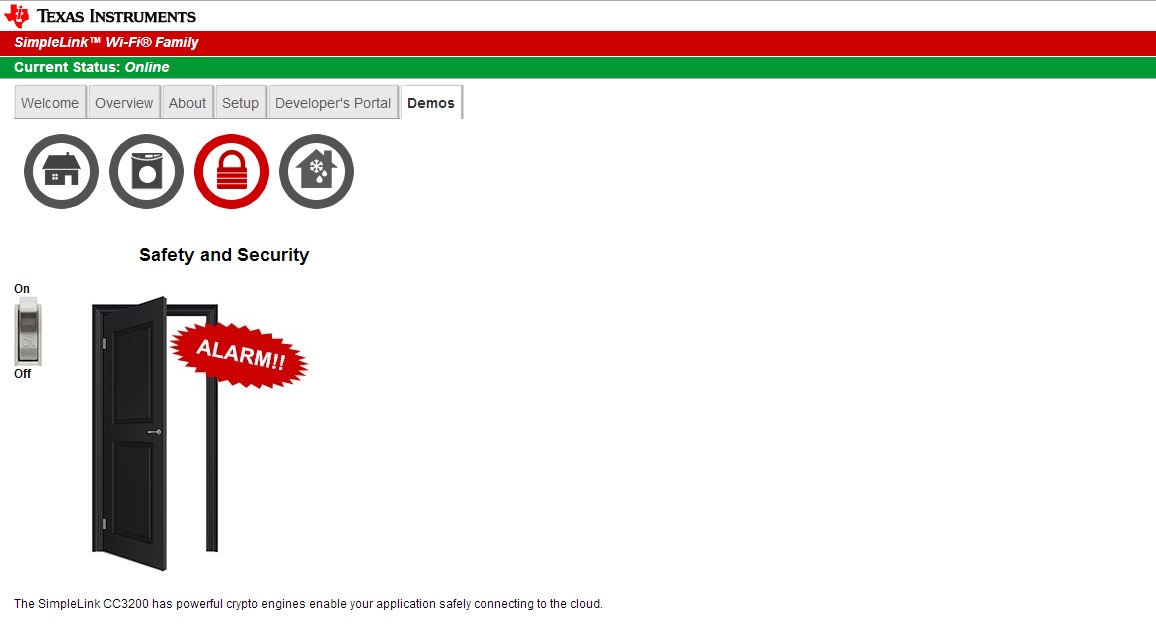
- Security System
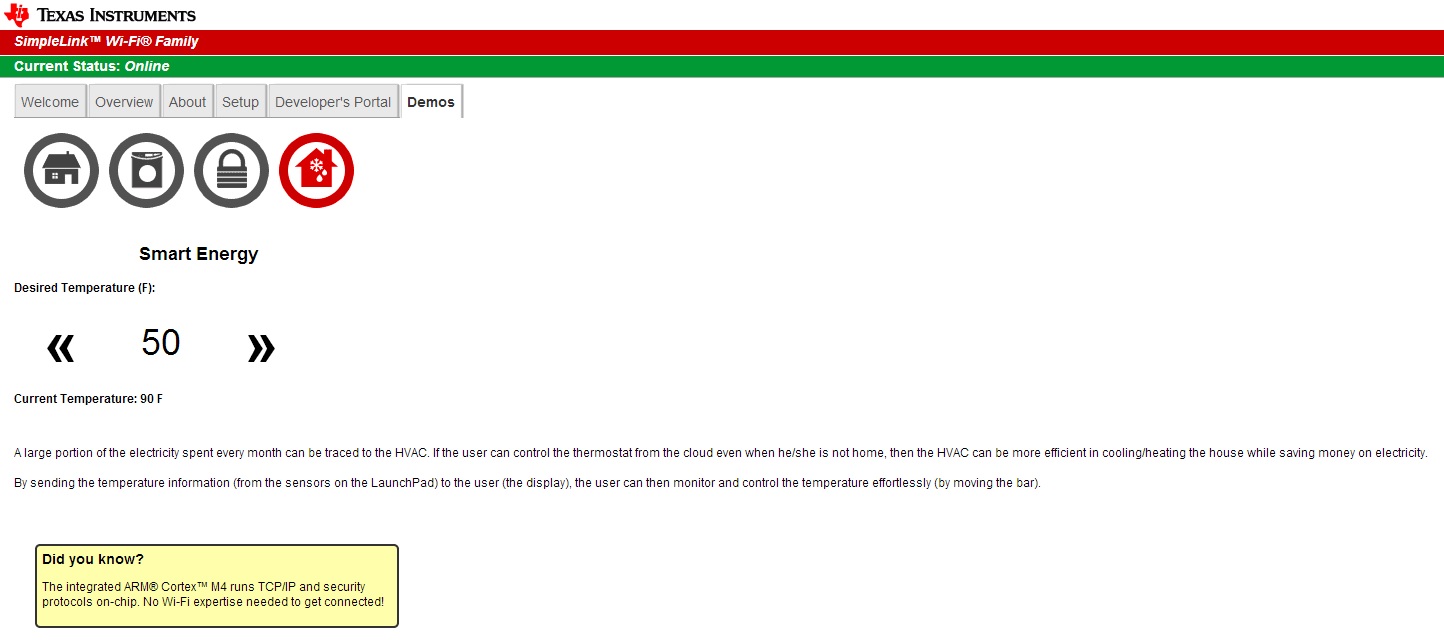
- Thermostat
For more information please refer CC32xx Quick Start Guide
Usage
- The CC3200 Launchpad comes with all the required content flashed to run the application
- Refer Quick Start Guide for detailed information
- In case user flashed other SDK applications and need to download the out of box content again, follow below steps
-
- Open <cc3200-sdk>\examples\out_of_box\html\out_of_box.ucf session file in Uniflash.
- Flash the files to the device. Detailed instructions at Uniflash User Guide.
-
- Run the reference application
- Run From IDE (IAR/CCS)
- Open the Example Project as mentioned in the <cc3200-sdk>\docs\CC3200-Getting Started Guide.pdf
- Build and download the application to the board
- Run From Flashed Binary
- Run From IDE (IAR/CCS)
- Connect to CC3200 device as mentioned in Quick Start Guide, You will see below main page on your browser
![]() Note: : In case device is coming up as AP (Jumper on VCC+P58) check Terminal prints to get to know device's AP name.
Note: : In case device is coming up as AP (Jumper on VCC+P58) check Terminal prints to get to know device's AP name.

Demos
Go to Demo Tab. Click/Press on the icons to see the demo
Turn the Switch ON/OFF and Check the Red LED(D7) on Launchpad
Check temperature from Inbuilt temperature Sensor on Launchpad. Move the Launchpad and check Dryer status

Turn on the Switch. Move the Launchpad and check Alarm
Change the temperature slider and check the RED LED (D7)
Limitations/Known Issues
None
Links
可以参考C:\ti\simplelink_cc32xx_sdk_1_40_01_00\examples\rtos\CC3220SF_LAUNCHXL\demos\out_of_box例程熟悉软件环境
Out Of Box
Table of Contents
- Example Summary
- Peripherals Exercised
- Example Usage
- Application Design Details
- Known issues and limitations
- References
Example Summary
This example demonstrates the Out of Box experience with CC3220 devices.
Peripherals Exercised
Board_LED0 (red LED)- Indicates that the board was initialized withinmain(). Since only this LED is used for status indication, similar indications may be applied in more than one occasion. To distinguish similar indications, the user needs to be aware of the executed procedure. The following table lists all options.
| red LED indication | Procedure | Interpretation |
|---|---|---|
| Blinking once per 2 seconds | Provisioning | CC3220 is being provisioned |
| Solidly on | Provisioning | Connection to Access Point is up |
| Solidly off | Provisioning | Connection to Access Point is down |
| Blinking once per second | Local network connection | For Station mode, connection to Access Point is in progress. For Access Point mode, initialization is in progress |
| Solidly on | Local network connection | For Station mode, connection to Access Point is up. For Access Point mode, initialization is done |
| Solidly off | Local network connection | Applies in Station mode only. Connection to Access Point is down |
| Blinking 5 times per second | Over the Air update | Over the Air update of CC3220 is in progress |
| Solidly on | Over the Air update | Over the Air update of CC3220 succeeded |
| Solidly off | Over the Air update | Over the Air update of CC3220 failed |
| Blinking once per second | Return to default | Return to default procedure is done. Waiting for the user to manually restart the CC3220 LaunchPad |
Board_initI2C (for onboard accelerometer)- I2C interface is used for control of the CC3220 Launchpad onboard accelerometer.
Example Usage
- Downloads and Installations.
- Make sure you have Uniflash installed.
- Make sure you have SimpleLink™ Wi-Fi® Starter Pro mobile application installed. This application can be downloaded and installed via the application stores. It is available both on iOS and Android. Users should look for WiFi starter pro.
- In case debugging is desired (advanced user), CCS or IAR IDEs are also required.
- Checklist of required elements.
- In case debugging is desired (advanced user)
- Uniflash projects according to device flavor.
- Certificate artifacts, ca.der certificate and ca-priv-key.der private key.
- In case debugging is not desired (basic user)
- Uniflash precompiled image according to device flavor.
- In case debugging is desired (advanced user)
-
Build the setup.
Make sure you have the a local AP and a mobile/tablet with SimpleLink™ Wi-Fi® Starter Pro mobile application installed.
- Uniflash
- Open Uniflash.
- Open the relevant Uniflash project according to the device flavor and rtos. The project can be found in
\Uniflash\OOB_<Flavor>_<rtos>.zip. - For basic users.
- Program the project to the target device.
- For advance users, building the project is required.
- Use the desired IDE (CCS or IAR) to open Out of Box project, make your modifications and recompile.
-
Replace the MCU image in the project and flash it.
The example could be executed from the debugger as well but since it involves platform reset at the end (so the new OTA image can be tested and committed),the debugger would get disconnected. More instructions can be found in paragraph 5. Flashing the Out-of-Box Project in the Out of Box user’s guide.
-
Open a serial session (e.g.
HyperTerminal,puTTY, etc.) to the appropriate COM port.The COM port can be determined via Device Manager in Windows or via
ls /dev/tty*in Linux.The connection should have the following settings
Baud-rate: 115200 Data bits: 8 Stop bits: 1 Parity: None Flow Control: None -
Run the example by pressing the reset button. The example should start running automatically when programming via Uniflash is done.
- First, the device needs to be provisioned. Connection to CC3220 can be done either by provisioning it to the local AP or by directly connecting to it while in AP mode.
- Provisioning: Using SimpleLink™ Wi-Fi® Starter Pro application, users can start AP provisioning or SmartConfig™ provisioning for fast CC3220 connection. During this procedure, the Access Point credentials are decoded by CC3220, and a profile is stored on the serial flash for future connection.
Board_LED0 (red LED)should blink once every 2 seconds to indicate provisioning is in progress. When provisioning is done and connection to the local AP is completed, the LED should turn solid on. Terminal message should show device is ready to be provisioned:[Provisioning task] Provisioning Started. Waiting to be provisioned..!!
[Provisioning task] Provisioning completed successfully..![Provisioning task] IP address is
- Direct Connect as AP: setting CC3220 as an AP is very convenient in cases where no Access Point is available. AP mode is applied by pressing the SW2 switch on the CC3220 Launch Pad.
Board_LED0 (red LED)should turn solid on. Terminal message should show:[WLAN EVENT] STA BSSID:with the MAC address of the connected device.[NETAPP EVENT] IPv4 leasedwith the assigned IP address.
Note: the only valid way to switch to AP mode is by using the procedure above. It is not valid to connect to the device during provisioning.
- Provisioning: Using SimpleLink™ Wi-Fi® Starter Pro application, users can start AP provisioning or SmartConfig™ provisioning for fast CC3220 connection. During this procedure, the Access Point credentials are decoded by CC3220, and a profile is stored on the serial flash for future connection.
-
At this point, users may proceed to the onboard peripherals demo or to the local OTA.
Local OTA is available via the mobile application only whereas the onboard peripherals demo is available also via the web browser.
-
Onboard peripherals demo: users can control and get the state of the onboard sensors. These sensors include the
Board_LED0 (red LED)and the accelerometer. Additionally, users can fetch some device specific information (SSID, Mac address and IP address). Web pages also include a 3D board movement when the device is moved. - Local OTA: available only via the mobile application.
-
Click the Check for software update button to test whether a new software version exists.
It is also possible to change the cloud repository by long pressing and holding the download icon next to Check for software update label, and filling the new URL
- Start the SW update by clicking Program button.
-
The upload progress bar appears with the following messages:
- Download started - Uploading new SW version - Extracting archive file - Writing to serial flash - Download done - Rebooting… - Testing new SW version - Upon successful update, the new version should appear under New SW version section. The Upload finished! message appears on the bottom of the screen, and the screen is enabled again. Terminal message should show:
[Link local task] sl_extLib_OtaRun: ---- Download file completed[Common] CC3220 MCU reset request
-
Application Design Details
The following features are highlighted:
- Easy connection to CC3220 LaunchPad
- Using SimpleLink™ Wi-Fi® Starter Pro application (available both on iOS and Android). User can use AP provisioning and/or SmartConfig™ provisioning for fast CC3220 connection.
- Configuring the device in Access Point mode gives users direct connection to CC3220 LaunchPad.
Once the device is provisioned and connected to an Access Point in station mode, the profile is stored on the local file system so that any reset to CC3220 automatically connects to the Access Point.
- Easy access to CC3220 via its internal web server
- The SimpleLink™ Wi-Fi® Starter Pro application (available both on iOS and Android).
-
Any browser, web pages stored on the serial flash are loaded on the browser, to provide ease of use.
This feature demonstrates configuring and reading onboard sensors.
- Over The Air (OTA) update, demonstrating an update of a full image. OTA service enables in-system update of the MCU application, CC3220 firmware releases (a.k.a. Service Pack) made available by Texas Instruments and other vendor files. An update procedure executed in a full system integrity fashion, i.e. failure in upgrading any of the image components would lead to rolling back to the previous valid version.
Known issues and limitations
- It is not valid to connect to CC3220 during provisioning (while it is periodically configured in AP mode). Configuring CC3220 in Access Point mode is allowed via SW2 switch as described earlier.
- Configuring CC3220 in Access Point mode is not persistence. It means that manual reset of the board makes CC3220 returns to its default, configures as Station, and tries to connect to a stored profile. If unsuccessful, it is configured in provisioning mode.
- Up to 20 non-default files can be updated during Over the Air update. Default files include files that are non-secured, part of bundle, fail-safe and with the size of the original file.
- Maximal file length inside a tar is 128 bytes. It is the full path as it appears in the tar file itself (including all directories from the root).
- Rarely, after provisioning is complete the LAN and OTA tabs do not appear. If these tabs do not appear, navigate to the Devices tab and select the device by pressing and holding it.
- Rarely, it is observed that the progress bar does not start or start but freeze in the middle; however the Over the Air update procedure is successful. In these cases, red LED (D7) indication and terminal printouts show the true status of the procedure, and also the Web client or mobile application should indicates a successful process.
References
- For full detailed user guide open the following website: http://www.ti.com/lit/SWRU473