cc3200使用uniflash进行Format的问题
cc3200使用uniflash进行Format时一直提示无法连接设备 并请求重启
[21:35:28] WARNING: ---seting break signal to false failed---
[21:35:30] INFO: setting break signal
[21:35:31] INFO: detecting FTDI for device reset
[21:35:31] ERROR: No device USB ports were found
[21:35:31] INFO: --- please restart the device ---
1. 确认SOP2有跳冒,
2. 按下复位按键
http://processors.wiki.ti.com/index.php/CC3100_%26_CC3200_UniFlash_Quick_Start_Guide
CC3100 & CC3200 UniFlash Quick Start Guide
(Redirected from CC31xx & CC32xx UniFlash Quick Start Guide)
![]()
![]()
Contents
[hide]- 1 Introduction
- 1.1 Scope
- 1.2 Overview
- 2 Prerequisites
- 2.1 Software
- 2.2 Hardware
- 3 Installation
- 3.1 SW upgrade
- 3.1.1 3.2.0.000123 to 3.2.1.00000 upgrade
- 3.1.2 3.2.0.00065 to 3.2.0.00120 upgrade
- 3.1.3 3.2.0.00065 upgrade
- 3.2 Linux
- 3.2.1 Limitations
- 3.2.2 During Installation
- 3.2.3 Running UniFlash
- 3.2.4 C++ Dependencies
- 3.2.5 COM Port
- 3.2.6 Porting between Windows and Linux
- 3.1 SW upgrade
- 4 CC32xx MCU image flashing
- 4.1 Overview
- 4.2 Connecting to the device
- 4.3 Formatting the serial flash
- 4.4 Service Pack Programing
- 4.4.1 General
- 4.4.2 Procedure
- 4.5 CC32xx MCU image erasing (CC3200 only)
- 4.6 CC32xx MCU image flashing (CC3200 only)
- 5 Troubleshoot/Debugging
- 6 Links
Introduction
Scope
This page describes the Uniflash utility functionalities and the general practice of using it with TI’s SimpleLinkTM CC31xx and CC32xx devices.
Please note this is just a Quick Start Guide and not the full user guide. The full user guide can be found under CC31xx & CC32xx UniFlash.
The paragraphs in this page list the minimal set of steps required for making the device operational.
Overview
The Uniflash utility allows the end-users to communicate with the Simple Link device via a standard UART interface. For UART connection, please refer to Annex A: UART connection.
The Uniflash utility enables the following functionalities:
- GUI interface
- Flashing of files (including read back verification option)
- Service pack flashing
- Storage format
- Versioning reading for boot loader and chip ID
- CLI interface
- Automatic reset of the board with any operation. Automatic reset is applicable only to TI evaluation boards, CC3100 BoosterPack and CC3200 LaunchPad. Applies to Windows version only
- Building and Flashing of configurations files (a file composed from a collection of parameters)
- Preparing offline image for gang programming and Image Programming via UART (not using direct flash programmers)
- Linux support
Upcoming for future releases:
- Reading system files
- Compatibility with secured file system implemented with TI’s Simple Link CC3x00 devices
Prerequisites
Software
Uniflash package installed on windows OS. Windows 7 and Windows XP are supported.
Hardware
Platforms supported:
- CC3200LP (supports ES1.32 and above)
- CC3100BP (supports ES1.32 and above) - Note that CC31XXEMUBOOST kit is also needed for flashing
- Other evaluation boards are also supported as long as connected to the correct UART port
- Concerto and Sonata serial flashing expects a 20MHz clock input
Installation
You can download the latest UniFlash here. Please read the Release Notes for more information about this release.
Once you have downloaded the UniFlash installer, you can install the UniFlash application using the provided executable. During installation, you need to choose where you would like to install the application.
 Note: up to version 3.2.0.000123, support for CC3xxx SimpleLinkTM devices was not part of the Uniflash main stream where all other platforms are supported. However, now that Uniflash has been upgraded to v3.3.x, CC3xxx SimpleLinkTM is also included as one of the supported chipsets. To prevent confusion, v3.2.x still supports the latest CC3xxx SimpleLinkTM(via SW upgrades).
SW upgrade
Existing users may choose to upgrade Uniflash rather than install it from scratch. Uniflash can be upgraded via the 'help->check for update' option.
3.2.0.000123 to 3.2.1.00000 upgrade
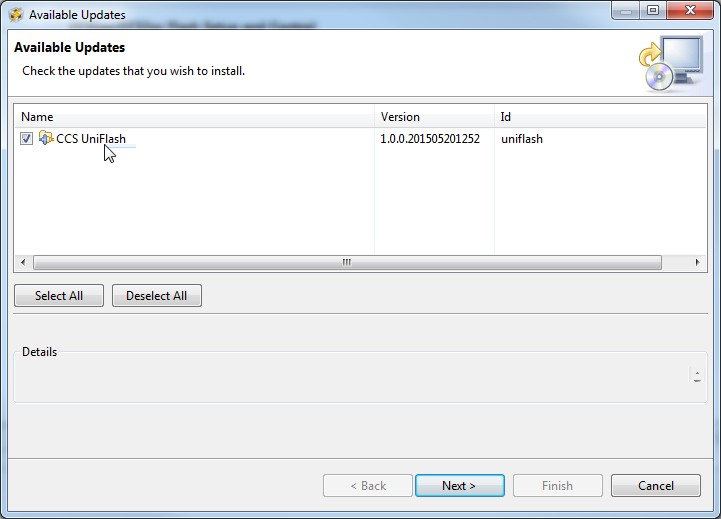
Upon checking for update, an available update should appear on the Window. Just click the Next button several times and accept the terms of the license agreement. Clicking Finish would fetch the latest 3.2.1.00000 version and install it instead of 3.2.0.000123.
3.2.0.00065 to 3.2.0.00120 upgrade
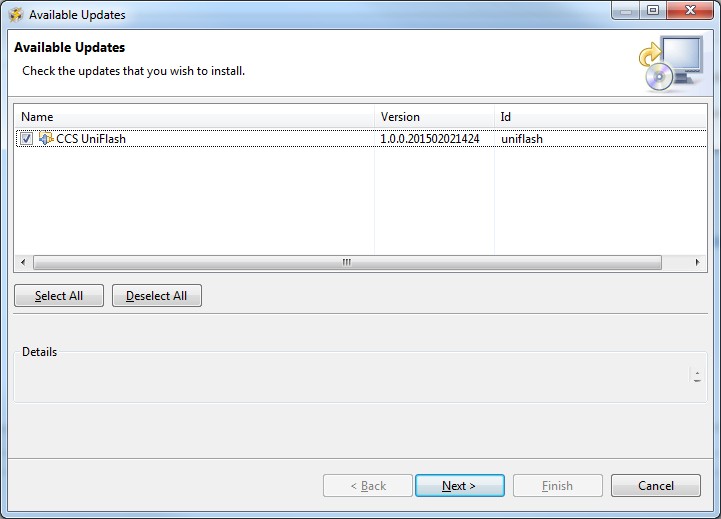
Upon checking for update, an available update should appear on the Window. Just click the Next button several times and accept the terms of the license agreement. Clicking Finish would fetch the latest 3.2.0.000120 version and install it instead of 3.2.0.00065.
3.2.0.00065 upgrade
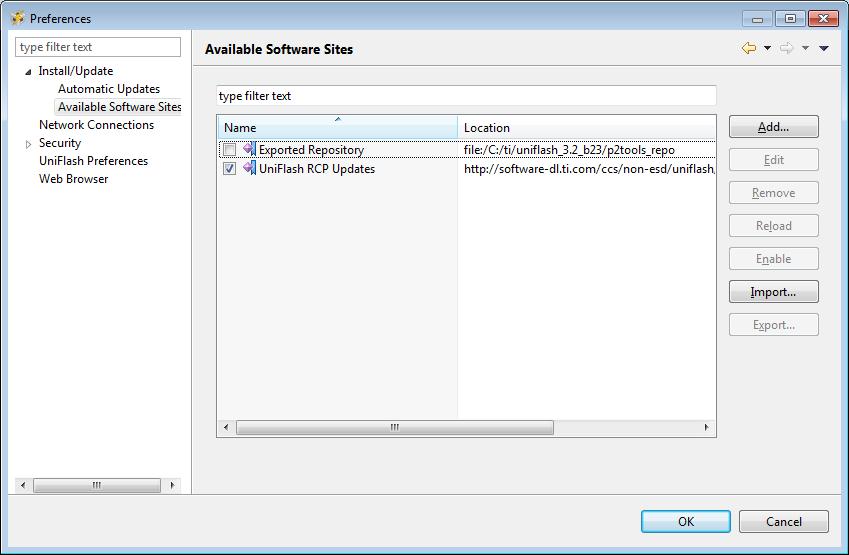
There is an update error for 3.2.0.00023 users only. If users check for updates, they will see the below error:
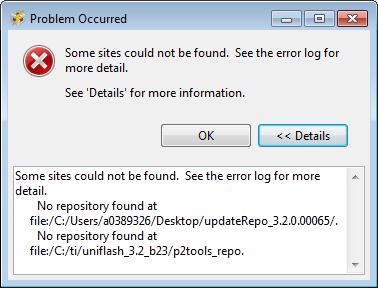
This error can be safely ignored. But if users want to prevent the error from happening, they can go to 'Window->Preference', 'Install/Update->Available Software Sites' tab, and unselect the 'Exported Repository' entry.
Linux
UniFlash is a 32-bit application. Therefore, if you are on a 64-bit Linux OS distribution, you will need to install the available 32-bit runtime libraries to be able to execute the UniFlash installer as well as run UniFlash after installation.
Since the dependencies between UniFlash and CCS are similar, please read the Linux Installation Instructions for CCS, search for your distribution from the supported list, and find the recommended packages to install.
Limitations
 Note: Linux Uniflash is a Beta version and not an official release
Current Linux version, v3.3 b67, has some limitations compared to the Windows version.
- No automatic reset of the connected target is supported (unlike Windows version)
- Using 'Verify' option (for files or image) results in much slower content reading than the Windows version
- It has been observed occasionally that communication with the target device is halted. It mainly happens during large content reading (i.e. with 'Verify' flag checked)
During Installation
The Linux installer also installs the drivers/permission files required to use the CC3100/CC3200 devices. But this process needs superuser/root access during installation, so it is recommended to use 'sudo' when invoking the installer.
Alternately, you can run the provided scripts to install the drivers/permission files after installation (but it stills need root access). The script 'cc3x_ftdi_usb_linux_install.sh' is available in the <installDir>/install_scripts/ directory.
Running UniFlash
When running UniFlash on Linux (either GUI or CLI), you will need to run it using sudo to get access to the USB/serial port.
Alternately, you can manually change the permission of the port after you plug in your device to your machine. Use 'chmod' to change the permission of the /dev/ttyUSBx port for your device. You will need to manually do this every time a new device is plugged into your machine.
Another alternative is to add the current user to the 'dialout' group to gain access to any serial port resource. Please talk to your network administrator on instructions for doing this.
C++ Dependencies
On some older distribution of Linux, the standard 32-bit C++ library that is included in the apt packages will not be compatible with UniFlash. Ubuntu 10.04 was an example of this that we noticed in our testing, which comes with libstdc++.so.6.0.13, but UniFlash requires a newer version (6.0.16 or newer). When UniFlash is started, it will fail to load the required libraries when a new session is created.
To work around this issue, we shipped a version of the required C++ library with the UniFlash install. To force UniFlash to load this version of the library, start the UniFlash GUI using the provided uniflashPre.sh in the <installDir>/eclipse/ directory. When this script is executed, the library will be loaded and UniFlash GUI will be started.
This issue only affects the GUI; users should be able to use CLI without running into this problem.
COM Port
When using UniFlash (in both the GUI and CLI), you will need to specify the 'COM' port for communicating with your device. In the Linux version, you only need to provide the numerical part of the 'ttyUSBx' string associated with the port for you device. So if you want to connect to ttyUSB2, just enter 2 as the COM port value instead of 'ttyUSB2'.
Porting between Windows and Linux
UniFlash Configuration/Session files should be compatible between Windows and Linux, as long as the file paths (ie; URLs) are updated to match the current folder structure of the new machine. You can use ${sessionDir} for your file paths if your user files are in the session directory to maintain cross platform compatibility. Please read the Relative Path Support section for more information on this topic.
CC32xx MCU image flashing
Overview
The recommended procedure includes the following steps:
- Connecting to the target device.
- Formatting the serial flash (optional). Note that the device is already pre-formatted. Thus, it is not required to format it but this step is described in case it is required.
- Programming the Service Pack
- Erasing the MCU image (CC3200 only)
- Flashing (and erasing if desired) the MCU image. The MCU image is the compiled binary application running on the internal MCU (CC3200 only)
Connecting to the device
Upon running the Uniflash, the user is required to choose the target setup. The target setup may be configured via the top bar by file->New Configuration or via the Quick Start Guide on the main screen by clicking New target configuration. Currently, the Connection is set to CC3x Serial(UART) Interface and the Board or Device is set to SimpleLink WiFi CC3100/CC3200.
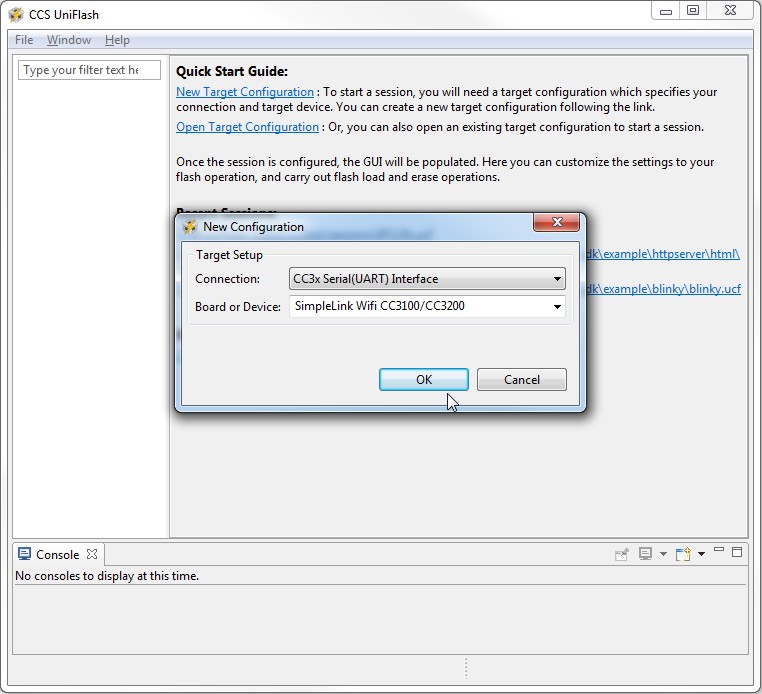
Loading the target configuration provides the Uniflash main screen.
The main screen is divided into 3 main sub screens.
- Uniflash main view: this is the upper left section on Main screen figure. All the presented data is parsed from the template XML and presented in a list form. The list is the list of target filenames.
- CC31x Flash Setup and Control: this is the upper right section on Main screen figure. It details the configurable options for each of the files chosen on the Uniflash main view. It also provides interface connection to the target device and buttons options (highlighted in next paragraphs).
- Console: this is a status window. Detailed information is printed during interaction with the device.
Connection to the target device is via UART interface. The user should configure the COM port number and the baud rate. Currently, no automatic detection of COM port is supported and the baud rate supported is 921,600 only.
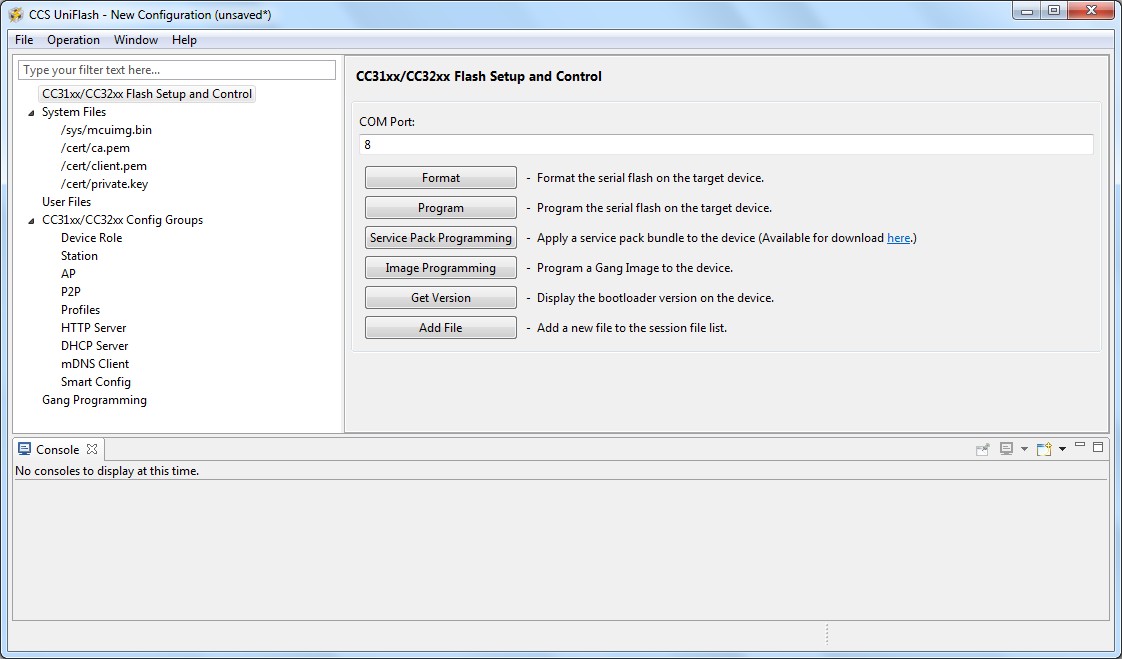
The COM port number needs to be fetched from the 'Windows Device Manager'. Ideally, all FTDI chipsets on the evaluation boards are pre-flashed. However, FTDI chipsets that are not flashed for some reason, can still be used as Uniflash requires a simple COM port.
The following table describes all possible permutations:
| Evaluation board | FTDI | #COM ports | #COM port for flashing |
|---|---|---|---|
| CC3200 LaunchPad | pre-flashed FTDI | 1 | the only COM port exposed |
| CC3200 LaunchPad | non flashed FTDI | 2 | the upper COM port |
| CC3100 BoosterPack | pre-flashed FTDI | 2 | the lower COM port |
| CC3100 BoosterPack | non flashed FTDI | 4 | the 3rd COM port |
In addition, CC3200 LaunchPad can be made to work in two modes, functional mode and UART load mode.
UART load mode is to be used when flashing the device. This mode is selected by connecting "SOP2" jumper on J15 (denotes on PCB as '100:FLASH').
Formatting the serial flash
If you are using pre-production CC3200 Launch Pad with XCC3101GZ or XCC3200HZ and you are using Uniflash version v3.2.0.00123 or earlier, the device must not get formatted as secured.
Uniflash version which is newer than v3.2.0.00123 does not have the option to set the format as secured.
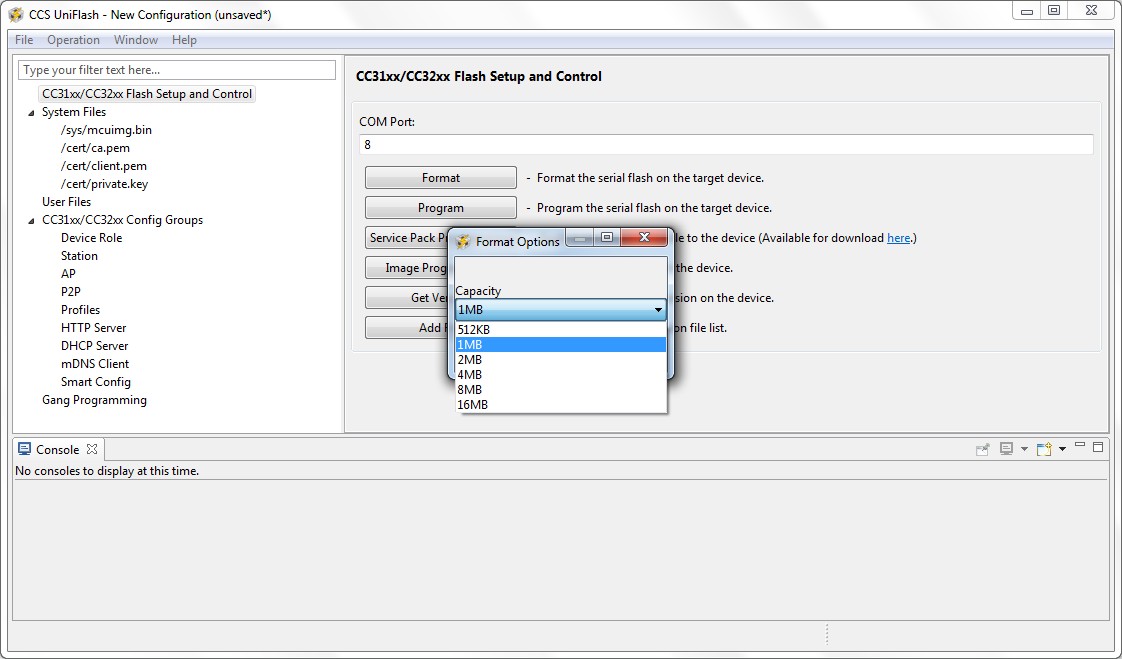
The user is required to choose the capacity storage. It is the responsibility of the user to choose a capacity less to or equal the total size of the serial flash. The options are: [512KB, 1MB, 2MB, 4MB, 8MB and 16MB].
Note: choosing a lower size than the actual size results only in not using the entire space (but no unexpected behaviors). However, choosing a higher size than the actual size may result in unexpected behaviors.
Service Pack Programing
General
Service pack is a common name for the image required for updating the device (either upgrade or downgrade the device). The service pack is a single file containing images for all flavors of the device, regardless if it is CC3100/CC3200 or ROM/Flash device. The detection is done automatically by Uniflash.
The service pack binary file is not part of Uniflash and should be fetched from TI repository separately.
Procedure
Please follow the ordered steps below for successful update procedure:
- 1.Format the device prior to flashing. This step is essential and should be performed at least once. With next service pack updates, format operation would not be required. Please follow Format paragraph for more details.
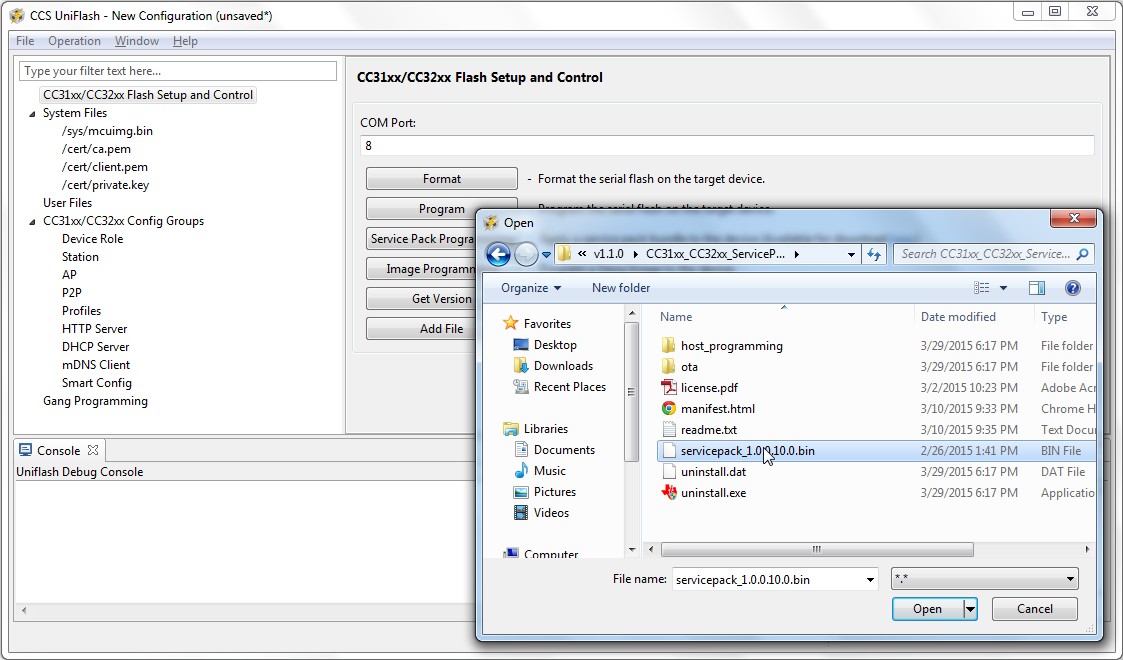
- 2.Invoke the Service Pack Update from a dedicated button or from the Operation->Service Pack Programming option in the top menu
- 3.Choose the binary servicepack file and click OK
- 4.Flashing should begin and the version flashed is printed just before flashing is started
CC32xx MCU image erasing (CC3200 only)
Erasing the MCU image file is essential since the new file may exceed the size allocated upon first creation. Uniflash enables the user to remove any file via the GUI using the 'erase' parameter under each file. Erasing a file requires the MAX token in case it is secured. If the file is not secured, tokens are not required. In any case, it is handled automatically by Uniflash. Checking the 'erase' option would only erase the file. Erasing of the device is applied upon pressing the 'Program' button. The Uniflash utility scans all target filenames listed and each file with the 'erase' argument set to True is erased from the device.
CC32xx MCU image flashing (CC3200 only)
MCU image should be flashed on CC32xx devices only. The MCU image is non-secured. Please follow the configuration as listed below:
- Name: /sys/mcuimg.bin (not configurable by the user).
- MaxSize: 0 to indicate the original file size. Please note that for production devices, the maximum possible size is 245760 bytes (240KB). The reason is that the RAM size is 256KB and 16KB are required by the system.
- Mode: nothing is checked, indicating a non-secured image. Rollback is mandatory in order to support OTA (non-configurable by the user).
- Signature: greyed out.
- Certificate: greyed out.
- Url: full path where the file is located.
- Erase checkbox: checked for erasing.
- Update checkbox: checked for flashing.
- Verify checkbox: checked for flashing verification.
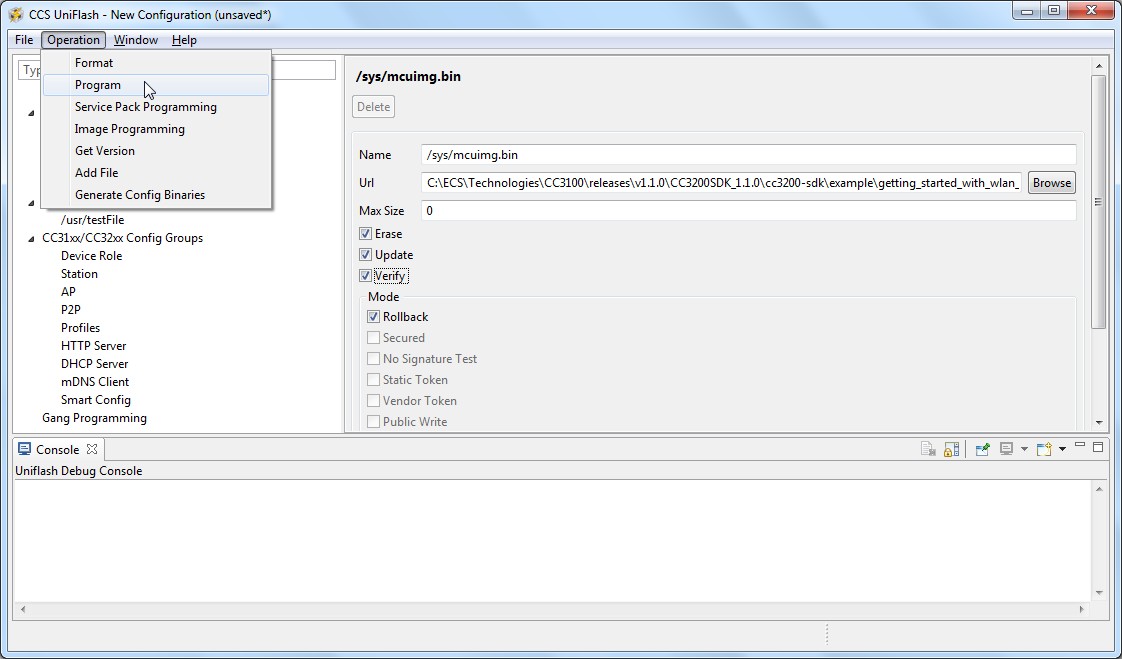
Upon pressing the 'Program' button, the file is flashed. The progress bar is updated frequently and messages are printed on the Console sub screen.
Troubleshoot/Debugging
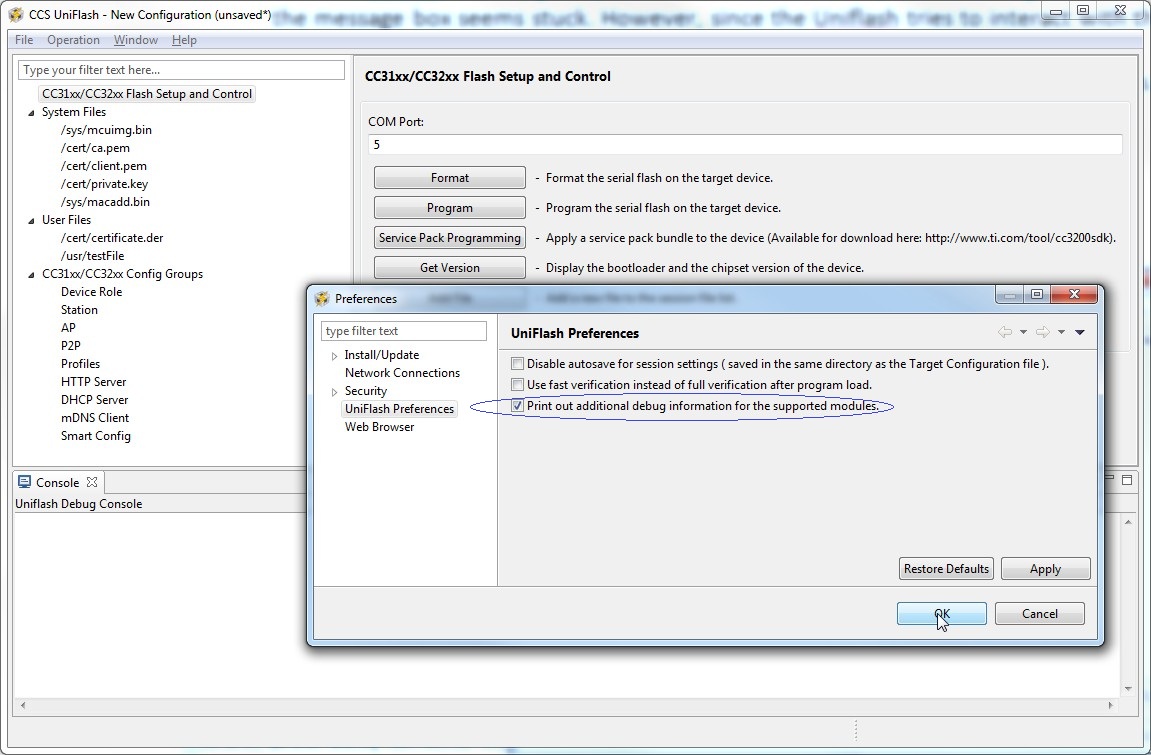
Debug messages are printed on the 'Console' screen. It is possible to control the verbose level of these printouts from the 'Window -> Preferences'. Under 'Uniflash Preferences', the 'Print out additional debug information for the supported modules' should be checked for full debug messages.
By default, this mode is enabled.
Following is a list of common Uniflash behaviors that might be perceived as erroneous but are actually not:
- Pressing 'cancel' during program operation. In this case, the progress bar on the message box is freezed and the Uniflash seems stuck. However, the Uniflash continues flashing the current file and when it is done, the message box is released. This is desired since there is no point in canceling during flashing as it may cause unexpected behavior in the device. In addition, if debugging information is enabled, the flashing messages can be seen on the Consle screen.
- Connecting to the device is applied on every operation (i.e. Program, Format, Get Version). When 'cancel' button is pressed during connection, the message box seems stuck. However, since the Uniflash tries to interact with the target device over UART and the user does not reset the board, it can take up to UART timeout for the cancel operation to take effect. UART timeout is 15 seconds. When the time elapses, the message box is released.
